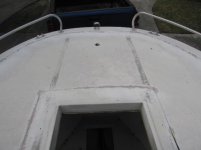
Guys been lost for a while busy with other items. Got the cuddy fixed and the boat is fishing again.
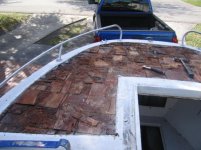
Didn't want to remove the cap so took a different rout and I'm very satisfied with the outcome.
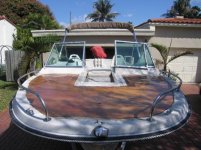
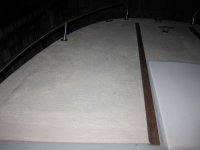
Took the time to refinish the teak and also made new rails for the cuddy slide door as mine were shot.
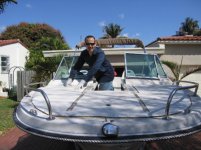
Painted over with Durabak textured, sanded and followed with Durabak smooth.
Now I don't feel like I'm gonna go through when I walk up there.
Didn't want to remove the cap so took a different rout and I'm very satisfied with the outcome.
Took the time to refinish the teak and also made new rails for the cuddy slide door as mine were shot.
Painted over with Durabak textured, sanded and followed with Durabak smooth.
Now I don't feel like I'm gonna go through when I walk up there.
Attachments
Last edited:
 ...I don't recall that approach here before to a common problem, but that looks like it turned out really good...what's the material in the pic just before the deck went back on?...what did you use there?...and can you be more specific re the fine version of duraliner...