1982 v20 cc tranny & other mods

TSP

New member
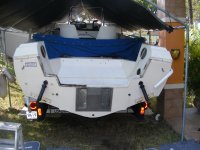
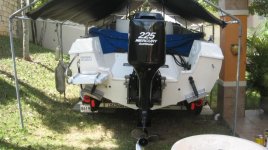
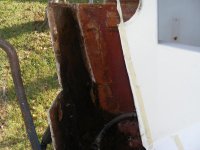
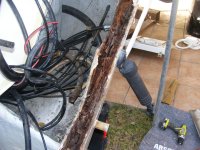
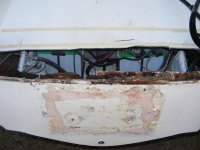
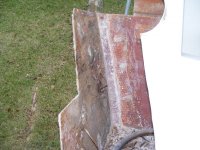
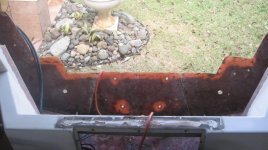
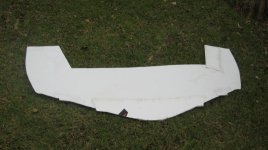
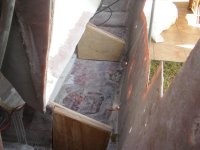
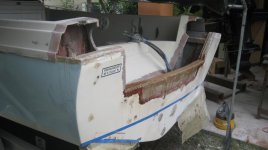
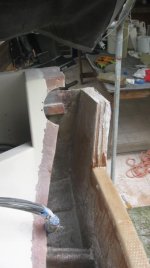
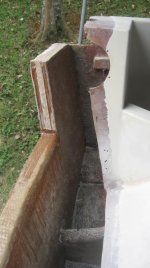
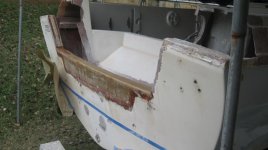
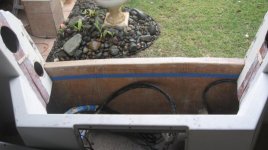
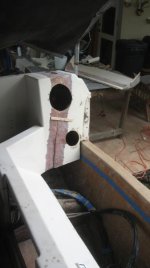
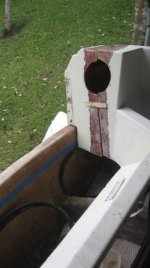
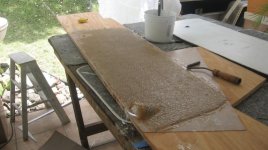
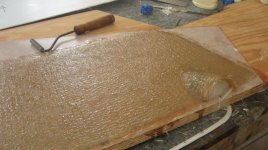
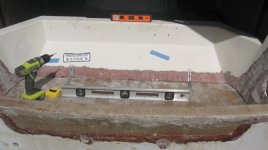
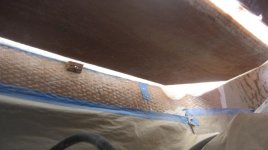
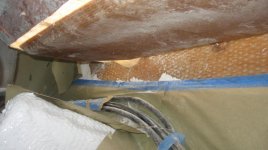
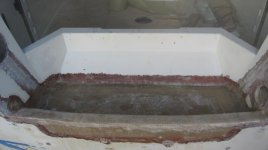
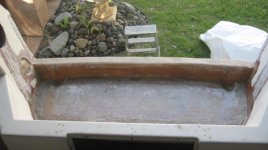
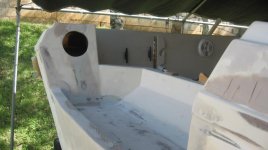
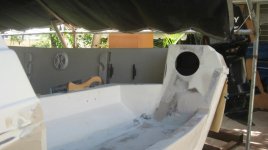
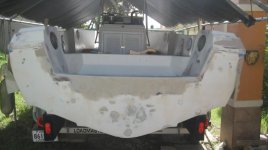
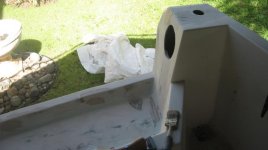
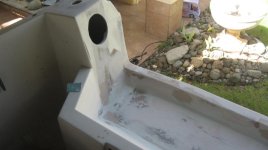
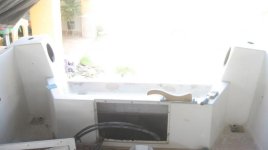
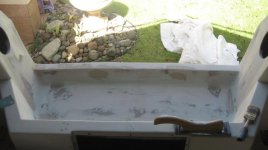
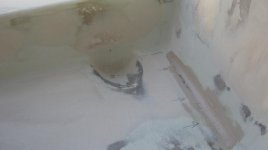
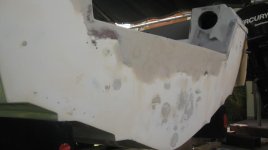
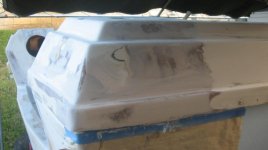
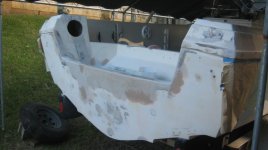
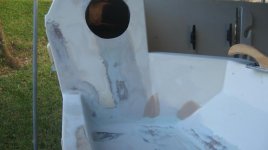
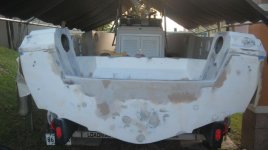
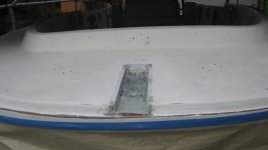
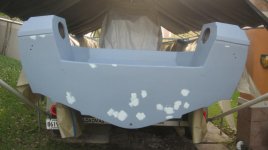
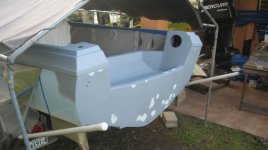
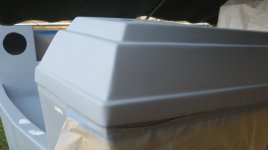
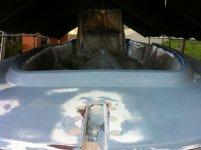
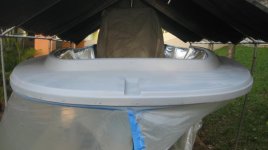
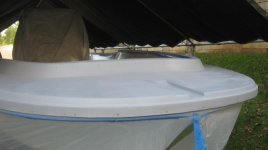
I'm new to the site. Congrads, great place to get pumped to keep working on a proyect. I,ve had my v20 since 2000 & realy learned to appretiate how great she is. Now that I found this site, the v20 is going to get the treatment of a 1965 gt350 mustang. Attached pics of my transom replacement & other mods I'm trying. Keep working on those v20,s.

Peter,
Toa Alta, PR.
 

Attachments

  • DSCF8050.jpg
    DSCF8050.jpg
    70.3 KB · Views: 115
  • IMG_0531.jpg
    IMG_0531.jpg
    68 KB · Views: 110
  • DSCF8053.jpg
    DSCF8053.jpg
    70.2 KB · Views: 107
  • DSCF8054.jpg
    DSCF8054.jpg
    91.7 KB · Views: 106
  • DSCF8055.jpg
    DSCF8055.jpg
    55.3 KB · Views: 100
Welcome....we have another member from Puerto Rico as well. JJTronics, although he is selling his V-20 it seems. Great work so far it looks like.
 
tnx RWilson. I've seen a handful of v20's & 18's on the island mostly on the west coast. Here are a couple more pic's.
 

Attachments

  • DSCF8051.jpg
    DSCF8051.jpg
    73.2 KB · Views: 57
  • DSCF8056.jpg
    DSCF8056.jpg
    67.5 KB · Views: 56
  • DSCF8058.jpg
    DSCF8058.jpg
    92.7 KB · Views: 55
  • DSCF8069.jpg
    DSCF8069.jpg
    67.4 KB · Views: 56
  • IMG_0655.jpg
    IMG_0655.jpg
    61.3 KB · Views: 63
Wow guy! You went all out to clean that mess. I ended up drilling the wood out from between the skins. Didn't want to cut off anymore than I had to. Good work!!
Makes me want to smack the crap out of the "repair specialists" who thought some bathroom caulk would work.
 
Putting the transom in

Nipper & KEEPINGITREEL: Imagine the shock I got when I took the cap off & saw that mess. The last owner put the boat in a slip for 2 years (yes in the water) and the transom holes leaked into the core. When I was cleaning out the rotted wood I noticed it had started from the top to the bottom. The only advantage is that it was fairly easy to clean with a air chisel & grinder. Attached pics of the transom install. The first pic is a template I made to cut the 3 panels. Tnks for the good luck, need it.
 

Attachments

  • IMG_0674.jpg
    IMG_0674.jpg
    53.4 KB · Views: 67
  • DSCF8006.jpg
    DSCF8006.jpg
    56.5 KB · Views: 73
  • IMG_0669.jpg
    IMG_0669.jpg
    41.9 KB · Views: 71
  • IMG_0670.jpg
    IMG_0670.jpg
    27.6 KB · Views: 68
  • IMG_0671.jpg
    IMG_0671.jpg
    30.9 KB · Views: 69
more pics

The transom was raised to 25" and I used 3 - 3/4" marine grade panels sandwiched w/ glass. The final result is a transom so hard u can literally slam it with a giant sludge hammer as hard as you want & it won't move.
 

Attachments

  • IMG_0672.jpg
    IMG_0672.jpg
    44.8 KB · Views: 56
  • IMG_0686.jpg
    IMG_0686.jpg
    55.2 KB · Views: 59
  • IMG_0687.jpg
    IMG_0687.jpg
    23 KB · Views: 53
  • IMG_0688.jpg
    IMG_0688.jpg
    31.3 KB · Views: 60
  • IMG_0690.jpg
    IMG_0690.jpg
    35.4 KB · Views: 57
rear deck pan design

I first made the deck-pan piece form apart, then glassed it in the opening inside & out. I made the pan as shallow as possible to use like a platform to exit & aboard the boat easier.
 

Attachments

  • IMG_0695.jpg
    IMG_0695.jpg
    57.7 KB · Views: 64
  • IMG_0696.jpg
    IMG_0696.jpg
    63.1 KB · Views: 61
  • IMG_0703.jpg
    IMG_0703.jpg
    40.4 KB · Views: 59
  • IMG_0704.jpg
    IMG_0704.jpg
    52.3 KB · Views: 59
  • IMG_0705.jpg
    IMG_0705.jpg
    37.9 KB · Views: 61
More pics

The hull was leveled to later level the deck and make sure the drains work properly.
 

Attachments

  • IMG_0706.jpg
    IMG_0706.jpg
    47.4 KB · Views: 59
  • IMG_0707.jpg
    IMG_0707.jpg
    33 KB · Views: 55
  • IMG_0708.jpg
    IMG_0708.jpg
    52.4 KB · Views: 55
  • IMG_0711.jpg
    IMG_0711.jpg
    38.2 KB · Views: 60
  • IMG_0716.jpg
    IMG_0716.jpg
    40.5 KB · Views: 66
"body work"

I spent dozens of hours applying mixes of cabosil with resin & body filler to make it straight & smooth.
 

Attachments

  • IMG_0709.jpg
    IMG_0709.jpg
    42.3 KB · Views: 51
  • IMG_0710.jpg
    IMG_0710.jpg
    45.6 KB · Views: 50
  • IMG_0711.jpg
    IMG_0711.jpg
    38.2 KB · Views: 49
  • IMG_0712.jpg
    IMG_0712.jpg
    40.1 KB · Views: 54
  • IMG_0713.jpg
    IMG_0713.jpg
    39.5 KB · Views: 50
more pics

More hours of work...
 

Attachments

  • IMG_0714.jpg
    IMG_0714.jpg
    37.2 KB · Views: 44
  • IMG_0715.jpg
    IMG_0715.jpg
    23.2 KB · Views: 43
  • IMG_0716.jpg
    IMG_0716.jpg
    40.5 KB · Views: 42
  • IMG_0717.jpg
    IMG_0717.jpg
    19.7 KB · Views: 41
  • IMG_0718.jpg
    IMG_0718.jpg
    24.4 KB · Views: 46
thanks a lot guys. Here are more pics after lots of filling & sanding.
 

Attachments

  • IMG_0720.jpg
    IMG_0720.jpg
    32.8 KB · Views: 32
  • IMG_0721.jpg
    IMG_0721.jpg
    41 KB · Views: 30
  • IMG_0722.jpg
    IMG_0722.jpg
    22.1 KB · Views: 30
  • IMG_0723.jpg
    IMG_0723.jpg
    33.8 KB · Views: 29
  • IMG_0725.jpg
    IMG_0725.jpg
    38.4 KB · Views: 34
Project update

Happy New Years to all.

After having to put the V20 to a side to fix some roof leaks & painting the home (have to keep the wife happy), I'm glad to resume the work on the V.

I'm going to install a anchor roller & rope pipe, but in a custom way. These pics show the mod & primer. Next, correct all the smaller flaws that appear by the hundreds after the primer.
 

Attachments

  • IMG_0726.jpg
    IMG_0726.jpg
    25.4 KB · Views: 38
  • IMG_0732.jpg
    IMG_0732.jpg
    36.6 KB · Views: 37
  • IMG_0735.jpg
    IMG_0735.jpg
    35.4 KB · Views: 38
  • IMG_0736.jpg
    IMG_0736.jpg
    43.1 KB · Views: 38
  • IMG_0737.jpg
    IMG_0737.jpg
    21.7 KB · Views: 39
more pics

more pics
 

Attachments

  • IMG_0043.jpg
    IMG_0043.jpg
    46.1 KB · Views: 30
  • IMG_0738.jpg
    IMG_0738.jpg
    33.9 KB · Views: 31
  • IMG_0739.jpg
    IMG_0739.jpg
    29.4 KB · Views: 34
Back
Top