Nida-Core Electrical Box (E-Box) Project

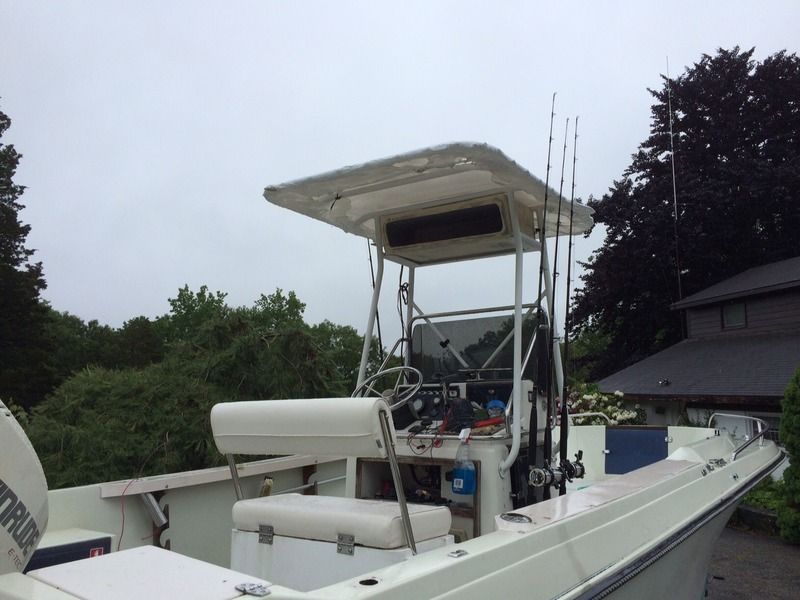
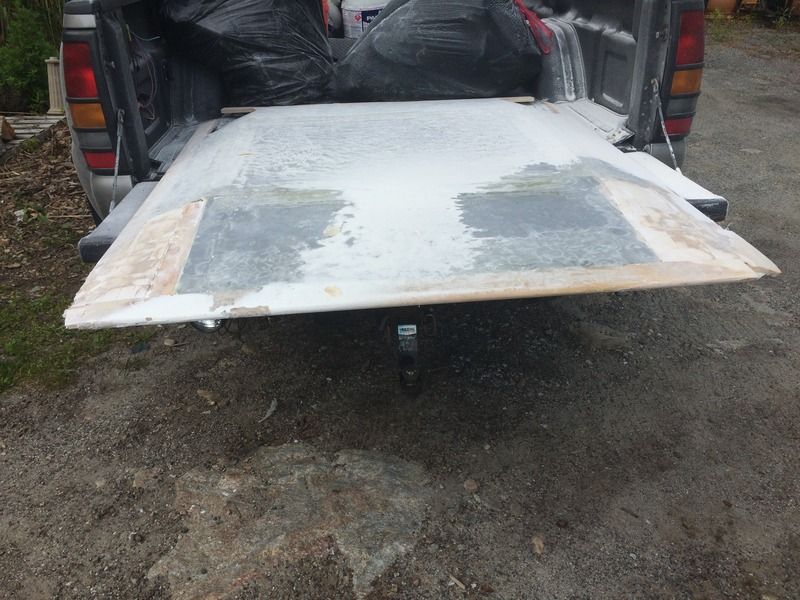
I priced out a sheet of Nida-Core. 1/2" 4x8 sheet was $261, which was about the price of a pre-made Ebox for my center console. The reason I bought this boat was because it had a T-Top. I want both a hard top and an E-Box to provide shade and a bit more space.

The problem was I didn't like the shape of any of the Ebox's for sale commercially. It turns out the 4x8 sheet is about the right amount of material for an E-Box and a hardtop. Thought it would be good to build the E-Box first.

Nida-Core seems like a good application for this. Rather than build a form and go for a glamorous look, I decided to built it from flat pieces tabbed together and try and keep both projects light.

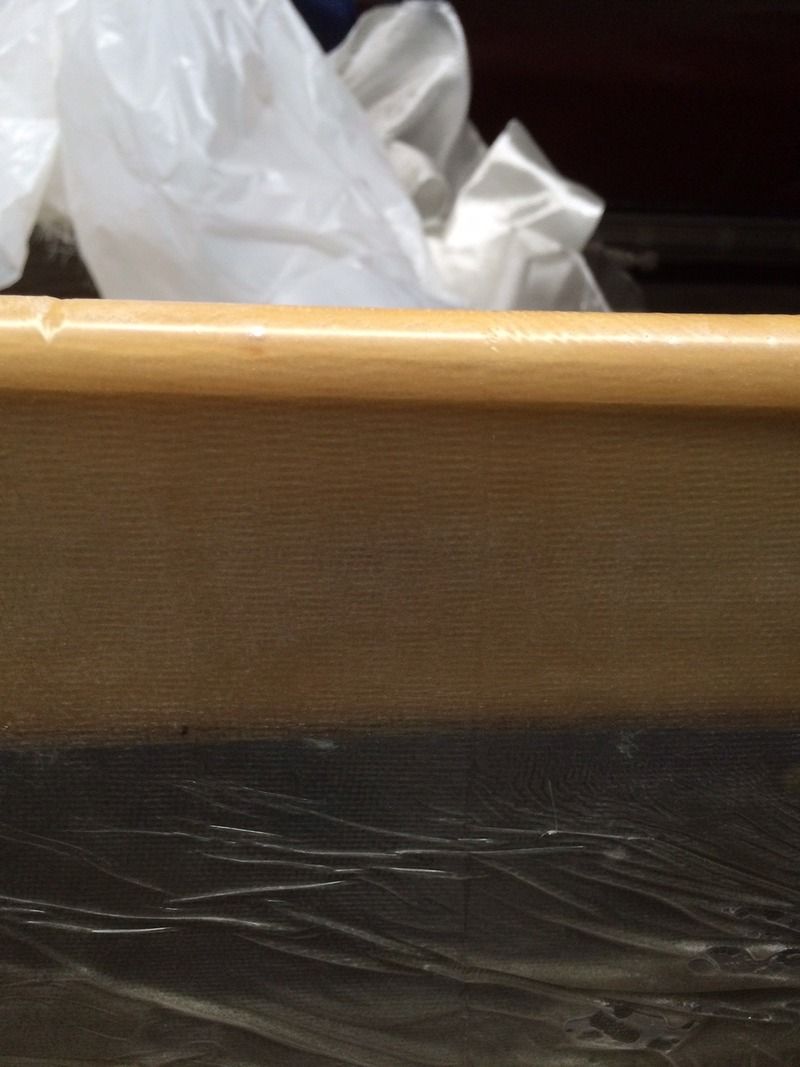
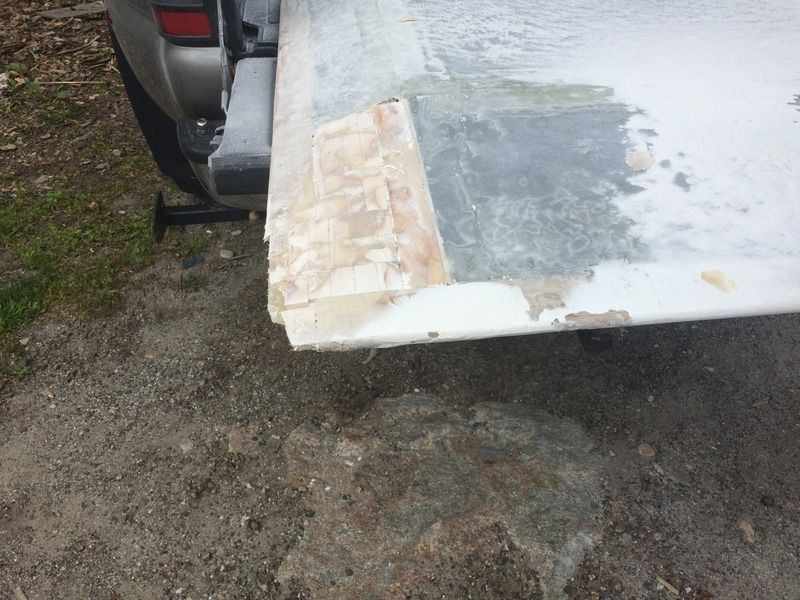
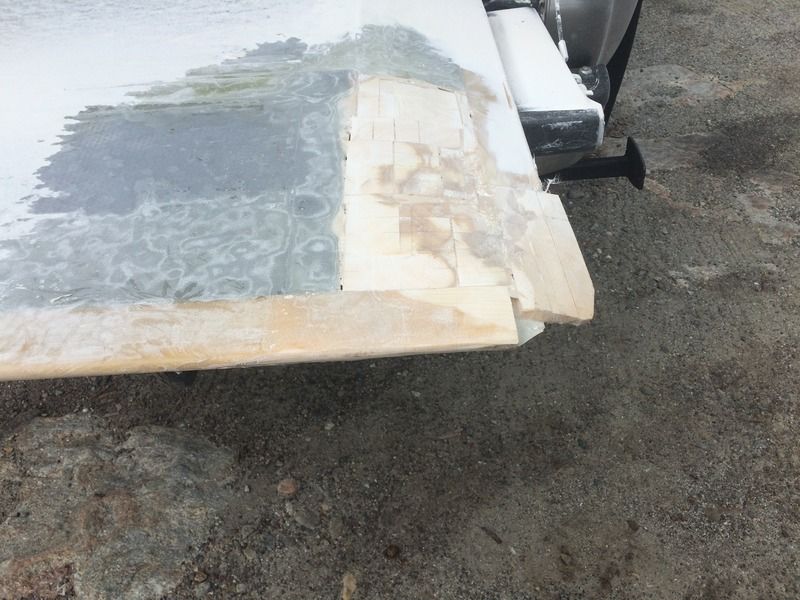
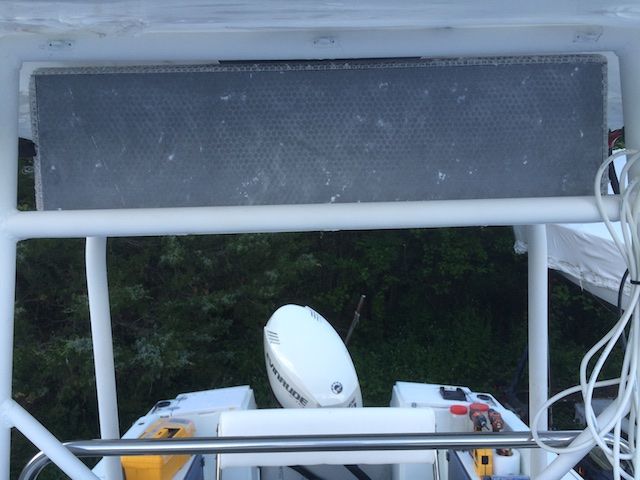
The one problem I had was the Nida-Core, is it came with a layer of gel-coat. Not what I wanted so I had to grind all that off.

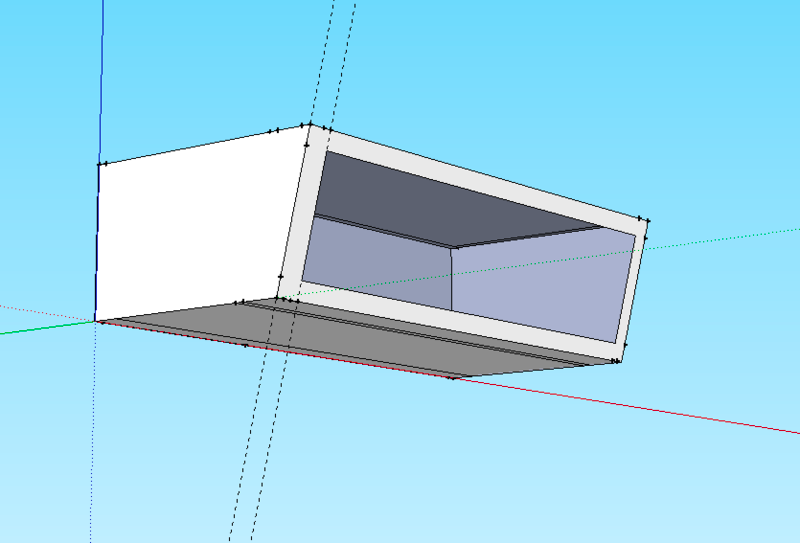
Here is my rough plan:

Design%20E%20Box_zpsxw9lra7o.png


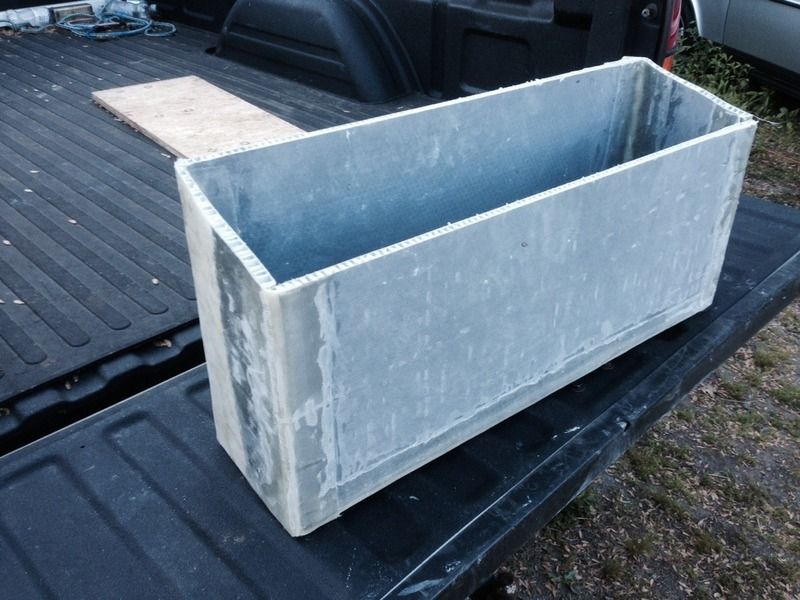
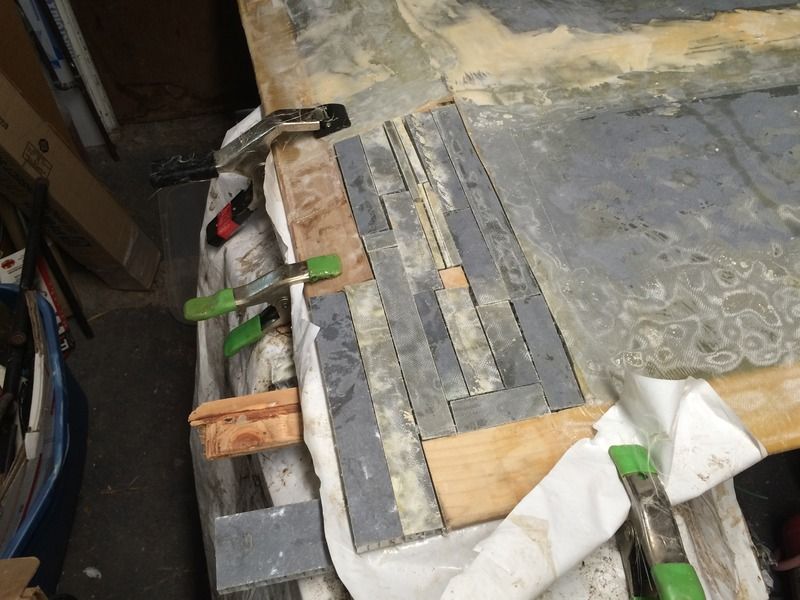
Progress so far. I've tabbed in the inside, and test fit it. I found it was a bit tight at the top, so I shaved off some material. I've since tabbed in most of the exterior--and just have the shaved area, which will need two more sessions--for tomorrow.


Here it is looking in the front. I plan to angle the front face downward slightly. I left both sides square so it would stand up while I worked.

Nida-Core%20013_zpsn8j6mafm.jpg


The top edge was a bit tight, so I shaved off both sides. This was my first test fitting. I actually shaved off quite a bit more at the top on both sides to allow room for a couple of layers of fiberglass cloth.

Nida-Core%20015_zpswhpf5v7c.jpg


Nida-Core%20014_zpsgpodiakn.jpg


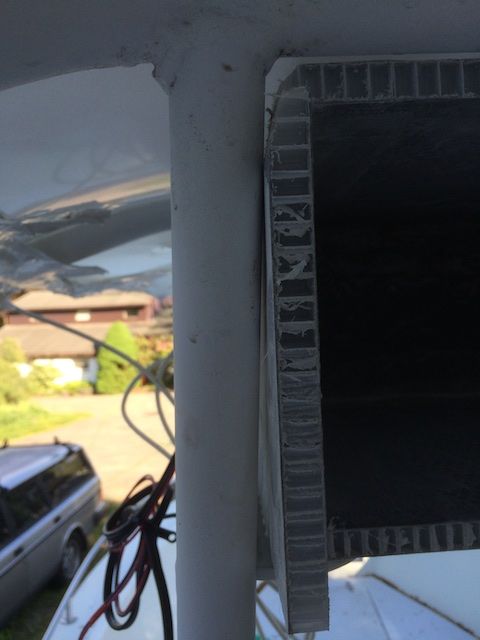
Here it is from the front:

Nida-Core%20016_zpsknjsna05.jpg


After I finish the sides, I'll cut two holes in the bottom for speakers.

Next, I'll start building a picture frame type faceplate. I also want to build a flush mount for a VHF radio, Stereo, and small chart-plotter/fish-finder. I need to figure out a way to hinge that so I can access it for service.

I also want a Plexiglass cover plate that I can lock closed when not in use and lock up when underway.

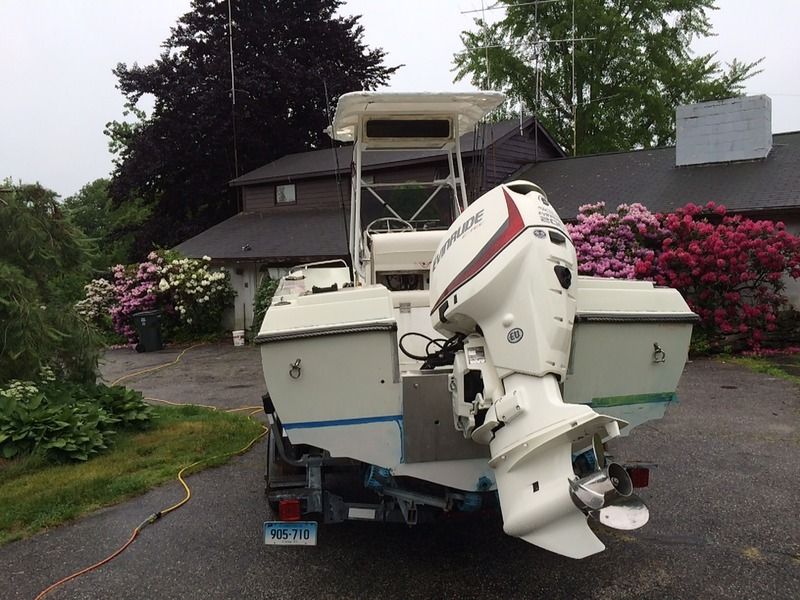
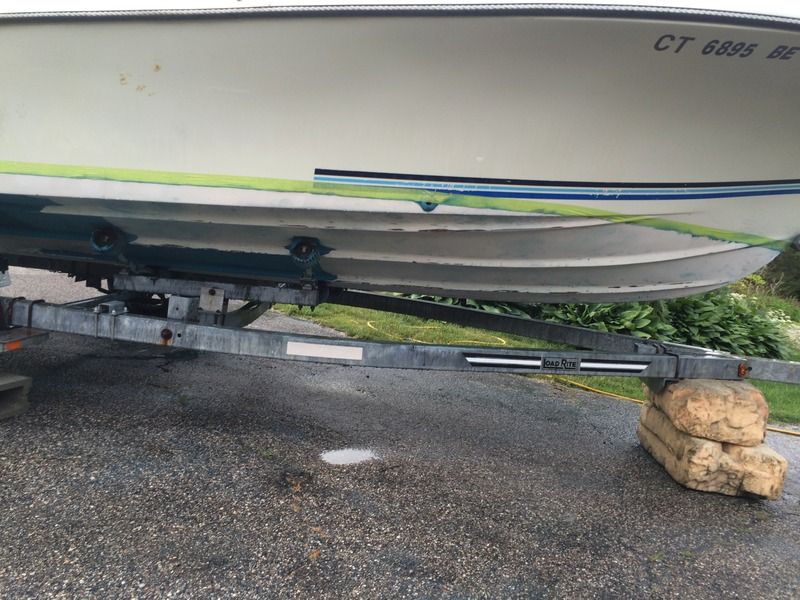
I've been doing lots to my center console. New seat cushions, all new wiring, switches, lights and fuse panels, mounted a 6 Amp charger and a Live well pump to glued in plywood panels on the hull to save space. I'm in the middle of installing trim tabs.

The only thing I kept--the courtesy lights. I like they way they look and it came with plenty of spare bulbs.
 
Cleaned up some edges trimmed. The far edge is 2" higher but it doesn't look it here.

EBox%201_zpsf1q3lvlw.jpg


The front picture frame panel was made out of three pieces because I was running out of material. Here is it. The three pieces were tabbed together and then I glued it to the main box. Tomorrow I'll be able to clean up the edges and tab the outside front. once dry I will be able to cut the opening and add some tape to the inside. After that I need to mount the interior panel for flush mounting the electronics and fair up the outside some.
 
Thanks for posting what you are doing with the NidaCore.
Interesting material, I've not been looking at stuff in a couple of years.
Another interesting thing is their pourable transom compound.

Looks good so far!
 
I plan on using a lot more of this stuff.

I want to make a splash board. If I put two strips of stainless steel, I could drop a simple panel in the gap, and it would add practically no weight to the boat.

I will also need to make a new engine cover for my sailboat.

I know a few gals that do canvas work. I was debating getting a canvas enclosure. Then I thought about a CC I saw in Noank that had a three sided enclosure and realized that would be cheaper to make one myself, out of Nida Core, than hiring a canvas, and I could make it removable. A possible future project.

One thing I won't do is buy this stuff with gelcoat. It is a PITA to remove.

BTW, my hardtop is coming along nicely. I have 7' of 1.5" fiberglass tube. I'm going to try to incorporate this into fore and aft handholds on the hardtop.

 
I've been busy building my hardtop out in the barn the last few rainy days. The weather is slowing me down.

I have finished most of the E-Box. I still need to work on the front face a bit, install a mount for the electronics, and then prime and paint it.

Here are a few shots of the E-Box after test fitting it. It fits my T-Top frame perfectly. It looks like it belongs there. When painted it will look like it has always been there.

I still have to decide how to finish the front. The plan is plexiglass. However, I have plenty of teak so I may make a teak frame for it. I'm leaning against that. In fact I want to remove all the teak on the boat and replace it with starboard. Once I finish this boat I want the maintenance to be very low. On the other hand the front face won't see much sun, so varnish and bright work may last a long time.

IMG_0014_zpseb2ytxlp.jpg


I've started sanding off all the old paint on the bottom. I found three layers in places and, a crappy epoxy repair with no glass. You always want to use a little glass. So I will grind that out and redo it. The trailer is in the way for much of this work, and so I will looking for some poppet stands to do the rest.

It is going slower than expected. Because of the strakes, I will have to hand sand much of it. It would have been easy to just slap another coat of ablative paint on it, but an ultra smooth hard finish will give me an extra knot or two. My goal is 44 knots, (50 mph) on flat water.

I really hate the look of the aluminum plate on the back of the boat. My transom is solid, I may redo that next year for a cleaner look.

I have the trim tab hydraulic pump and controls installed.

The installers left the two drain scuppers full of sealant. It was a PITA to get that out.

Now that the bottom paint is removed, once the rain stops and I can prime and finish installing the Trim Tabs.
IMG_0010_zpspxqtpghh.jpg


My shrink wrap T-Top cover idea would probably have worked very well--it is on there very tight. It did help keep the sun off of me while I rewired the boat--but it will be cut off in the next few days when I test fit the hardtop. The four corners of which need to be trimmed.

I found 7 feet of 1.5" fiberglass tubing. I plan to cut that and use it for grab bars fore and aft on the hardtop. The after one will be perfect for people standing behind the helm.

I didn't quite have enough material for the entire hardtop and wanted to extend it out with a bit of overhang. So I used 2.75" strips of 1.2" birch around the outside to stiffen things up a bit on the edges. I am thinking about adding two stainless steel rails on each side so I can strap things down on top--like a kayak, or to use as a grab bar on each side of the boat for people moving forward. The birch will provide some compressive strength to the hardtop, and the fore and aft ones, will help bond the fore and aft grab bars.

I used a router to round the edges of the wood, and then two boards, a plastic garbage bag split open and many clamps to get a nice finish on the edges. The will need only a little work to make them perfect. The left side shows a mark made by a clamp. The boards were a little thinner than the Nida-Core, so I built that up with a layer of mat and two layers of cloth. Then I wrapped two layers of cloth completely around the wood with about 6-8" of overlap on each side.
IMG_0011_zpsazxuhejw.jpg


One of the aluminum tabs on the T-Top frame is missing. So I'll need to weld on a new one. I'll need all four tabs to bolt down the hardtop and in particular, to secure the two grab bars.

I'll have some final shaping of the corners and bonding the mounts and grab bars to do after the last of the birch is tabbed on. Then I'll be fairing it smooth and ready for paint.
 
Nice work, good looking boat too.

"Angle the front downward" and adding the plexiglass door are both really great ideas. I had a e-box on one of my boats. The plexiglass was dark tinted and served double duty as a rear view mirror. It wound up being a catch all only housing a VHF. I attempted speakers but even the best shielded ones I could find made the compass dance. The compass on the Whaler was somewhat of a centerpiece of the custom fiberglass molded dashboard. To change that would have been ooodles and oodles of additional work. I decided to put 6x9's elsewhere.

How do you like the honeycomb for project making/glassing? I have used Coosa (foam reinforced with glass fiber), but have no experience with the honeycomb stuff because I was scared of the voids. Can water get in there? I see it being used in high dollar, high end go-fast boats and the like, so I don't doubt it is quality stuff. I am Just curious..I was scared I couldn't make the edges look right trying to lay wet glass across the voids..
 
It is looking better. I replaced the seat bottom and back, which helped a lot. I also put a piece of black plexy on top of the console which covered 16 holes.

I am a but worried about the compass too. We shall see how it works out. I'll need to decide soon. I'll place them up there and see what happens.

I have not used Coosa. I've used balsa when I recored the deck on one of my boats. I also re-cored one of my hatches on this boat, but I built it up too heavy. It is nice and solid now, but it came out too heavy. I suppose it is only one hatch and doesn't matter much.

I like Nida Core. I suppose it would be more difficult to work with if you had just the "core" to work with. I'd be scared too.

Mine came in panels with a layer of glass on each side. And gelcoat. I ground off all the gelcoat and wish I'd taken more time to find some Nida-Core without gelcoat. It was not hard but tedious. If you add thickness tabbing the corners, then some fairing is required to make it flat.

For the hard top, I'm debating adding a few layers of glass on the top for thickness and to give it some camber.

How much do I like it? The E-Box weighs 9 lbs. I can pick up the hardtop with one hand.

I've already got plans in my head for more projects using the stuff.

I am toying with the idea of making a three sided hard enclosure. I wrapped up the console in plastic and tabbed the hardtop together in-place. All that work and I didn't spill a drop when I tabbed it together. All that plastic showed me what a solid enclosure would look like. My first thought was to make a canvas enclosure, and hiring the work out because I've never done and don't have a sewing machine. Those canvas covers always seem to shrink and then you fight a battle to zip them up. Then I though, hmm, why not make a hard enclosure? And then, why not make it removable? Why, not angle the top glass so there is no glare? Perhaps someday I'll do that. A full enclosure, hard on three sides and a canvas back would be very nice on cold days particularly with wind chill.

BTW, I am replacing the interior of a 46' sloop this summer. One of my projects is replacing the engine cover as the new engine has a smaller profile. Nida Core would be perfect for that. I also want to box off the engine as much as possible for sound deadening. I plan to tab in Nida Core every place I can to deaden sound. There are a few spots under the deck where that would help. I also have some lead sheeting. Nida, foam sound insulation, and lead sheets in combination could make that motor very quiet. I'd like that.

For the Center Console, I want to build a spash well. There is an indent and latches for one. My boat didn't have one when I bought it, probably because it interfered with the 20" shaft motor after they cut the transom down 5". I feel better with the plates raising the transom 5", but not completely safe. Remind me to tell you how my friend Saul sank two boats in one day.

I can build something that won't interfer with the motor. If I use Nida Core, it will weigh almost nothing. My also plan is to add two strips of stainless on either side to make the L channel into a U-channel so I can just drop a board in place, and use the existing latches to hold it down.

One 4x8 sheet of Nida Core would be enough to do the engine box on the sailboat, and the splash well on the CC.

Perhaps at some point I'll try just using the core. There must be a good method of bonding it to a fiberglass surface? Perhaps thickened epoxy, like West Systems 403 would work. Someone must know how to work with it.
 
Damn shame about the glasses, what is your name again? Lilly? is that you? I thought I told you to avoid the lines you got to take them all the way off... :zip:
 
Unfortunately, I lost of few of the hard top images I took. I've tabbed together the major pieces. The four corners are complex curves I scrapped my first attempt as it didn't fit well with the hardtop frame. I had some balsa core and decided to use that on two of the corners to see how it looked before doing the other side.

Using a variety of supports I glassed in the bottom side. Today I pulled out the grinder and smoothed out boat sides. The follow pictures show the top side ready for some filler and then fiberglass.
IMG_0121_zpsdhbcnkej.jpg


The corners will be rounded off, so I have to cut away some of the excess material. It's raining now, so I can't test fit it. Perhaps I'll make a template and cut from that, as I'd like to glass both these corners today.
IMG_0122_zpsoqbzdwqt.jpg

IMG_0123_zps2mem6saf.jpg


In the mean time, my new chartplotter/fishfinder came in. I have one of the first of these RayMarine eS78's. I have a piece of 1/2" mahogany marine plywood that I'll use to flush mount this. I'm gluing the backing and cutting the plywood next.
Raymarine%20eS78_zpswgnqn3ou.png


Soon, I'll be painting. Nothing but paint in the following picture.
Screen%20Shot%202015-06-09%20at%2015.30.36_zpsyulgb0pd.png
 
Still working on the hardtop Two corners to go. I'm starting to wish I took the trouble to make a form. Oh well, I'm on the home stretch. I used balsa core on the last back two corners and since I ran out I switched to pieces of Nida-Core cut small to conform to the curves.

IMG_0133_zpsstgopxzi.jpg


On another front, 12 hours of sanding has yielded on dead sander and about 1/2 of the bottom sanded clear. At least four layers of bottom paint have to be sanded and it is difficult around the strakes.

IMG_0134_zpsucjkjqzj.jpg


I plan to move it to my brothers house, where my excavator is located to lift it off the trailer, or perhaps slide it back for better access.

IMG_0137_zpselz4uajj.jpg


Meanwhile I've been working on the flush mount panel on the E-Box. After cutting the lawn I may go work on that some more. It's cooler in the shop. Outside temps have been high lately and will continue over the weekend.

Somewhere I have a picture of the E-Box...that's not it. Wonder what happened to it.

Screen%20Shot%202015-06-12%20at%2019.33.13_zpsyikfar3m.png
 
Back
Top